Madeleines are those little scallop-shaped pastries that seem to lie somewhere between cute little cookies, and tasty cakes. They are buttery like cookies, yet their consistency is that of a tiny cake of medium density. While some recipes classify them as being little hand-held cakes, I feel that their closest relative is actually a Lady Finger. However you want to label these lemon and vanilla treats, they are just plain delicious.
Historically these have been around since 18th century France when King Louis XV named them “Madeleines” in honor of the wife of his father-in-law’s personal cook: Madeleine Paulmier. It was Louis XV’s wife, Queen Consort Marie, who loved these little mini-cakes so much that she served them at the court of Versailles, and instantly made them famous throughout France.
They are regarded as being so typically French that Madeleines were also memorialized in Marcel Proust’s “Remembrance of Things Past” (a/k/a “In Search of Lost Time”) which was originally published in the early 1900s. In this famed seven volume work, Madeleines were spoken of fondly, as having a unique memory-triggering taste. How can you not love baking a French pastry with an exciting past? Impossible!
These little gems are quite easy to make, but they are delicate enough to require a bit of careful handling to get them to come out right. The only special item that is required is a distinctively shaped Madeleine baking pan, which molds the cakes and enables you to make a dozen at a time. Since one batch of batter makes exactly 24 Madeleines, you can either purchase two of these specific pans or simply bake them in batches of 12 at a time.
I first had these in a coffee shop, and immediately fell in love with them. The distinct mix of lemon and vanilla flavors, the crunchy edges, and the cute shape of them made me an instant Madeleine fan. After a little research and a bit of “tweaking,” I present my twist on the Madeleine: a treat so yummy it caused a culinary rage at Versailles in the 1700s!
Ingredients:
Madeleine Batter:
—4 ounces of melted unsalted Butter
—1 cup Flour
—2/3 cup Sugar
—2 Eggs
—1 tablespoon Genuine Vanilla Extract
—1 tablespoon freshly squeezed Lemon Juice
—1 tablespoon Lemon Zest
—1/8 teaspoon Salt
—1 teaspoon Baking Powder
To coat the Madeleine pan:
—1/4 cup extra Flour
—1-2 tablespoons extra Butter
Garnish:
—1/2 cup Powdered (Confectioner’s) Sugar
Directions:
While you melt the four teaspoons of butter in a small sauce pan over low heat, zest the lemon peel with a grater. When you have a tablespoon of lemon zest, set it aside. Juice the lemon juice and put a tablespoon of it in a large mixing bowl.
Add the two eggs to the mixing bowl with the lemon juice, and add the vanilla extract. Beat the eggs, juice and extract with a whisk until slightly frothy. When it is frothy, add the lemon zest to the liquid.
In a separate mixing bowl add the flour, sugar, salt, and baking powder. Mix it together with a whisk.
When the butter is melted, you can begin the “dry and wet” mixing process. Add the powdered mixture to the wet ingredients, stirring the developing batter with a whisk or spatula. Add the melted butter to the batter, pouring it in one third at a time, and continue mixing until all of the butter is incorporated into the batter.
The batter will now be smooth and consistent, and a pleasant yellow shade. Allow the batter to sit for 30 minutes. This will give the butter a chance to properly sink into the flour, and the batter will slightly congeal.
To prepare the Madeleine pan(s) grease each scallop-shaped indent with the extra butter. Then, using a fine screened sieve, take a tablespoon of the extra flour, and lightly dust the buttered pan with flour. Dump any extra flour from the pan. You might want to turn the pan upside down and hit it on the side of the counter or sink to remove any excess flour from the pan.
NOTE: Make sure all of the grooves of the “scallops” are buttered and floured, or there could be sticking when they are baked.
Once the pan is ready, and the half an hour of batter resting time is about to end, preheat the oven to 350 degrees Fahrenheit.
After the batter has sat for a full 30 minutes, it is time to fill the buttered and floured indents in the pan. I find that using two standard tablespoons, is best for what comes next. Take approximately one tablespoon of batter in one tablespoon, and using the second tablespoon scrape it loose and let it fall into the Madeleine mold.
NOTE: Be careful not to overfill the mold with batter. Fill each indent with no more than a tablespoon of batter, which should represent no more than half-full for each Madeleine. If you get them too full, you might experience some pan-sticking afterwards.
Since you are working with a pan with a dozen indents for the pastries, when you have 12 filled, you should be left with exactly one half of your batter remaining. If you have to remove or add any of the batter to balance it, don’t worry about the exposed surface of each individual Madeleine, in the oven the batter is going to melt nice and flat.
Place the filled pan(s) in the 350 degree oven, and bake for 17 to 20 minutes. The finished look you want to achieve entails a nice browning around the edges. You can also use a toothpick in the center of one of the Madeleines to test the “doneness” if you like.
When baked, remove the Madeleines from the oven, and allow them to cool in the pan for five minutes. When the five minutes of cooling is over, using a fork, and starting with the flat end of the Madeleine, start to pry them loose. Ideally, they should pop right out of the molds. The “worse case” scenario might find you needing to loosen them on all four sides.
If you have baker’s racks, these are ideal for cooling the Madeleines, and applying the powdered sugar topping. Once you have a dozen of the still-warm little cakes scalloped-side upward on the baker’s rack (or on a plate, or a piece of wax paper), it is time to add the powdered sugar.
Place a heaping tablespoon of powdered sugar in a fine screened sieve, and lightly dust the Madeleines with the desired cascade of snowy sweetness. Once you get the powdered sugar on the scalloped surface of each Madeleine, they will look even more delicate and perfectly-shaped than when they first come out of the molds.
NOTE: If you have only one Madeleine pan, wipe out the pan with a cloth or paper towel, butter and flour the pan, fill and bake the second batch of 12 while the oven is still hot.
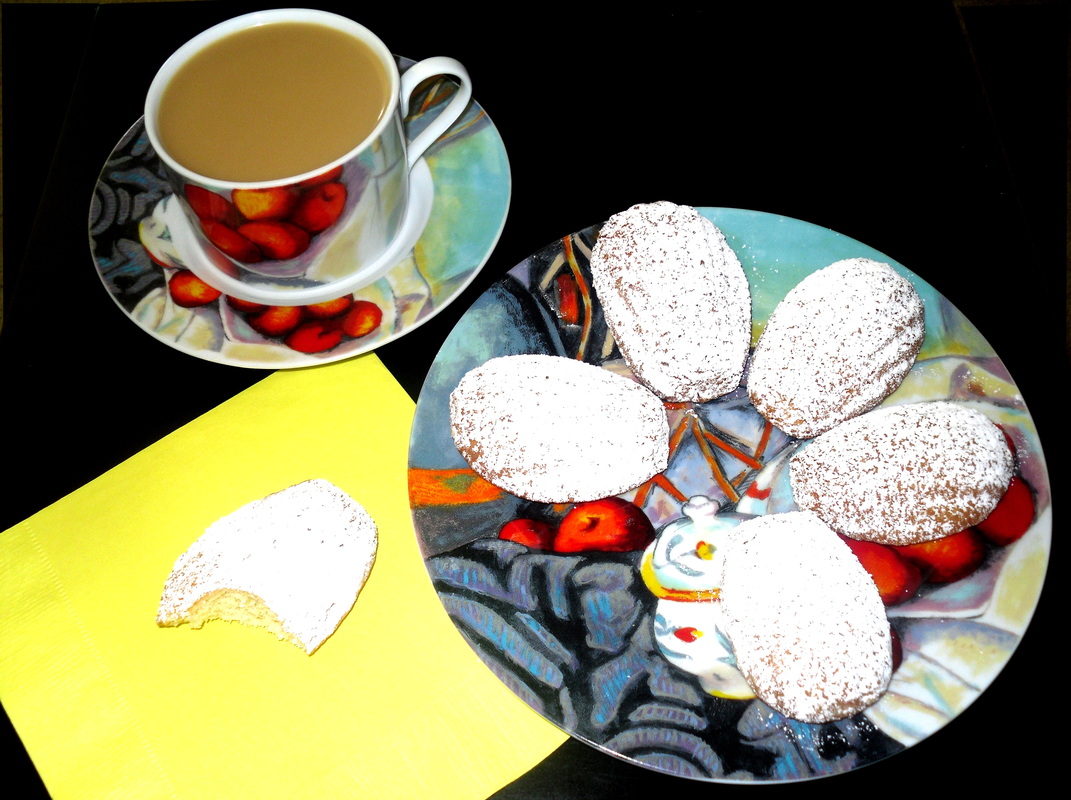
Like anything baked, Madeleines are incredibly good to eat while still warm, freshly baked, and newly dusted with powdered sugar. No matter what happens to their temperature from this point forward, the Madeleines are absolutely “make your head spin” delicious! You can arrange them beautifully on a plate to serve them, and they will look as wonderful as they taste.
For storing, I would recommend placing the finished Madeleines on a small plate, and placing the plate in a large zippered storage bag, and sealing it. If you leave them uncovered overnight, they will start to dry out, however they are none-the-less still delicious even with a slightly crunchy and “cookie-like” texture.
Since Madeleines are tasty little cakes that were good enough to serve the King and Queen Consort of France at Versailles, I guarantee you will find these to be a royal treat as well!
Historically these have been around since 18th century France when King Louis XV named them “Madeleines” in honor of the wife of his father-in-law’s personal cook: Madeleine Paulmier. It was Louis XV’s wife, Queen Consort Marie, who loved these little mini-cakes so much that she served them at the court of Versailles, and instantly made them famous throughout France.
They are regarded as being so typically French that Madeleines were also memorialized in Marcel Proust’s “Remembrance of Things Past” (a/k/a “In Search of Lost Time”) which was originally published in the early 1900s. In this famed seven volume work, Madeleines were spoken of fondly, as having a unique memory-triggering taste. How can you not love baking a French pastry with an exciting past? Impossible!
These little gems are quite easy to make, but they are delicate enough to require a bit of careful handling to get them to come out right. The only special item that is required is a distinctively shaped Madeleine baking pan, which molds the cakes and enables you to make a dozen at a time. Since one batch of batter makes exactly 24 Madeleines, you can either purchase two of these specific pans or simply bake them in batches of 12 at a time.
I first had these in a coffee shop, and immediately fell in love with them. The distinct mix of lemon and vanilla flavors, the crunchy edges, and the cute shape of them made me an instant Madeleine fan. After a little research and a bit of “tweaking,” I present my twist on the Madeleine: a treat so yummy it caused a culinary rage at Versailles in the 1700s!
Ingredients:
Madeleine Batter:
—4 ounces of melted unsalted Butter
—1 cup Flour
—2/3 cup Sugar
—2 Eggs
—1 tablespoon Genuine Vanilla Extract
—1 tablespoon freshly squeezed Lemon Juice
—1 tablespoon Lemon Zest
—1/8 teaspoon Salt
—1 teaspoon Baking Powder
To coat the Madeleine pan:
—1/4 cup extra Flour
—1-2 tablespoons extra Butter
Garnish:
—1/2 cup Powdered (Confectioner’s) Sugar
Directions:
While you melt the four teaspoons of butter in a small sauce pan over low heat, zest the lemon peel with a grater. When you have a tablespoon of lemon zest, set it aside. Juice the lemon juice and put a tablespoon of it in a large mixing bowl.
Add the two eggs to the mixing bowl with the lemon juice, and add the vanilla extract. Beat the eggs, juice and extract with a whisk until slightly frothy. When it is frothy, add the lemon zest to the liquid.
In a separate mixing bowl add the flour, sugar, salt, and baking powder. Mix it together with a whisk.
When the butter is melted, you can begin the “dry and wet” mixing process. Add the powdered mixture to the wet ingredients, stirring the developing batter with a whisk or spatula. Add the melted butter to the batter, pouring it in one third at a time, and continue mixing until all of the butter is incorporated into the batter.
The batter will now be smooth and consistent, and a pleasant yellow shade. Allow the batter to sit for 30 minutes. This will give the butter a chance to properly sink into the flour, and the batter will slightly congeal.
To prepare the Madeleine pan(s) grease each scallop-shaped indent with the extra butter. Then, using a fine screened sieve, take a tablespoon of the extra flour, and lightly dust the buttered pan with flour. Dump any extra flour from the pan. You might want to turn the pan upside down and hit it on the side of the counter or sink to remove any excess flour from the pan.
NOTE: Make sure all of the grooves of the “scallops” are buttered and floured, or there could be sticking when they are baked.
Once the pan is ready, and the half an hour of batter resting time is about to end, preheat the oven to 350 degrees Fahrenheit.
After the batter has sat for a full 30 minutes, it is time to fill the buttered and floured indents in the pan. I find that using two standard tablespoons, is best for what comes next. Take approximately one tablespoon of batter in one tablespoon, and using the second tablespoon scrape it loose and let it fall into the Madeleine mold.
NOTE: Be careful not to overfill the mold with batter. Fill each indent with no more than a tablespoon of batter, which should represent no more than half-full for each Madeleine. If you get them too full, you might experience some pan-sticking afterwards.
Since you are working with a pan with a dozen indents for the pastries, when you have 12 filled, you should be left with exactly one half of your batter remaining. If you have to remove or add any of the batter to balance it, don’t worry about the exposed surface of each individual Madeleine, in the oven the batter is going to melt nice and flat.
Place the filled pan(s) in the 350 degree oven, and bake for 17 to 20 minutes. The finished look you want to achieve entails a nice browning around the edges. You can also use a toothpick in the center of one of the Madeleines to test the “doneness” if you like.
When baked, remove the Madeleines from the oven, and allow them to cool in the pan for five minutes. When the five minutes of cooling is over, using a fork, and starting with the flat end of the Madeleine, start to pry them loose. Ideally, they should pop right out of the molds. The “worse case” scenario might find you needing to loosen them on all four sides.
If you have baker’s racks, these are ideal for cooling the Madeleines, and applying the powdered sugar topping. Once you have a dozen of the still-warm little cakes scalloped-side upward on the baker’s rack (or on a plate, or a piece of wax paper), it is time to add the powdered sugar.
Place a heaping tablespoon of powdered sugar in a fine screened sieve, and lightly dust the Madeleines with the desired cascade of snowy sweetness. Once you get the powdered sugar on the scalloped surface of each Madeleine, they will look even more delicate and perfectly-shaped than when they first come out of the molds.
NOTE: If you have only one Madeleine pan, wipe out the pan with a cloth or paper towel, butter and flour the pan, fill and bake the second batch of 12 while the oven is still hot.
Like anything baked, Madeleines are incredibly good to eat while still warm, freshly baked, and newly dusted with powdered sugar. No matter what happens to their temperature from this point forward, the Madeleines are absolutely “make your head spin” delicious! You can arrange them beautifully on a plate to serve them, and they will look as wonderful as they taste.
For storing, I would recommend placing the finished Madeleines on a small plate, and placing the plate in a large zippered storage bag, and sealing it. If you leave them uncovered overnight, they will start to dry out, however they are none-the-less still delicious even with a slightly crunchy and “cookie-like” texture.
Since Madeleines are tasty little cakes that were good enough to serve the King and Queen Consort of France at Versailles, I guarantee you will find these to be a royal treat as well!