NOTE: I happen to love Fresh Raspberry Pie, and certainly there are several ways to prepare and bake one. In the past I have precooked the filling before baking it, to make certain that the filling gels. Unfortunately, once the pie cooled down after baking, I was left with a Jello-like filling. For that reason, I developed this REALLY EASY way to keep the fresh raspberries the star of the show, while still solidifying them into a not-too-sweet filling. This particular recipe has been a huge hit, and I think you will love it!
Ingredients:
–2 Pie Crusts, one for the top, and one for the bottom.
–4 cups of Fresh Raspberries
–6 tablespoons of Corn Starch
–1 cup of Sugar
-2 tablespoons of Water
Directions:
You will need enough dough to make two unbaked piecrusts. If you are making your own crust, double the recipe. (See my simple pie dough recipe, with the Fresh Lemon Pie recipe).
If you use pre-made piecrusts, you will need two of them.
Place the rolled-out lower crust in a nine-inch pie pan, and make the edges even, all the way up to the lip of the pie pan.
With the second piecrust, lay it out on either a lightly floured cutting board, or the lightly floured kitchen counter.
Next, prepare the filling. This could not be easier. Place the raspberries in a large mixing bowl. Add the cornstarch, sugar, and water, and stir these three ingredients until the raspberries are coated. If you break any of the raspberries, that is fine. You don’t want to mash them, but you can allow some of them to break and bleed in this process.
Place the sugar and cornstarch coated raspberries into the bottom piecrust, making for an even filling. If there is any mounding of berries, mound it towards the middle of the pie shell.
With a sharp knife, cut the second rolled out raw piecrust into one-inch strips. Place the longest one across the middle of the pie. If you imagine your pie pan to be a clock, have the first strip of dough extend from 12:00 o’clock to 6:00 o’clock. The next long strip should be placed from 3:00 o’clock to 9:00 o’clock. Do not affix the strips to the bottom piecrust yet.
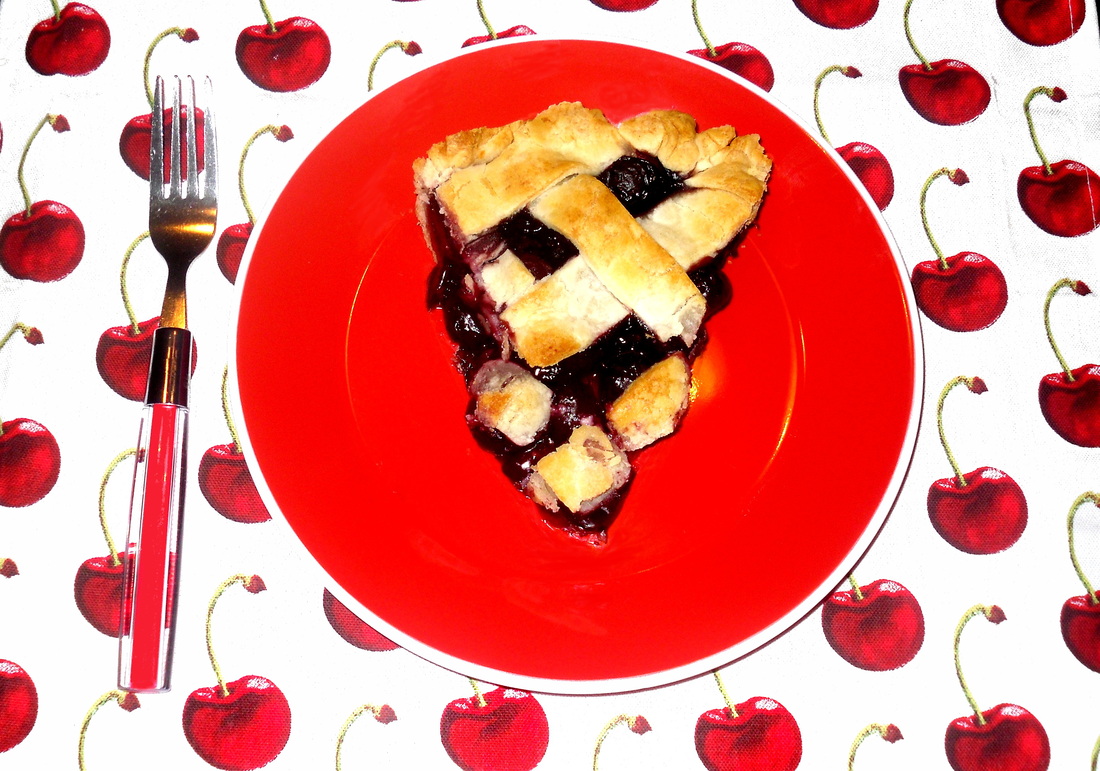
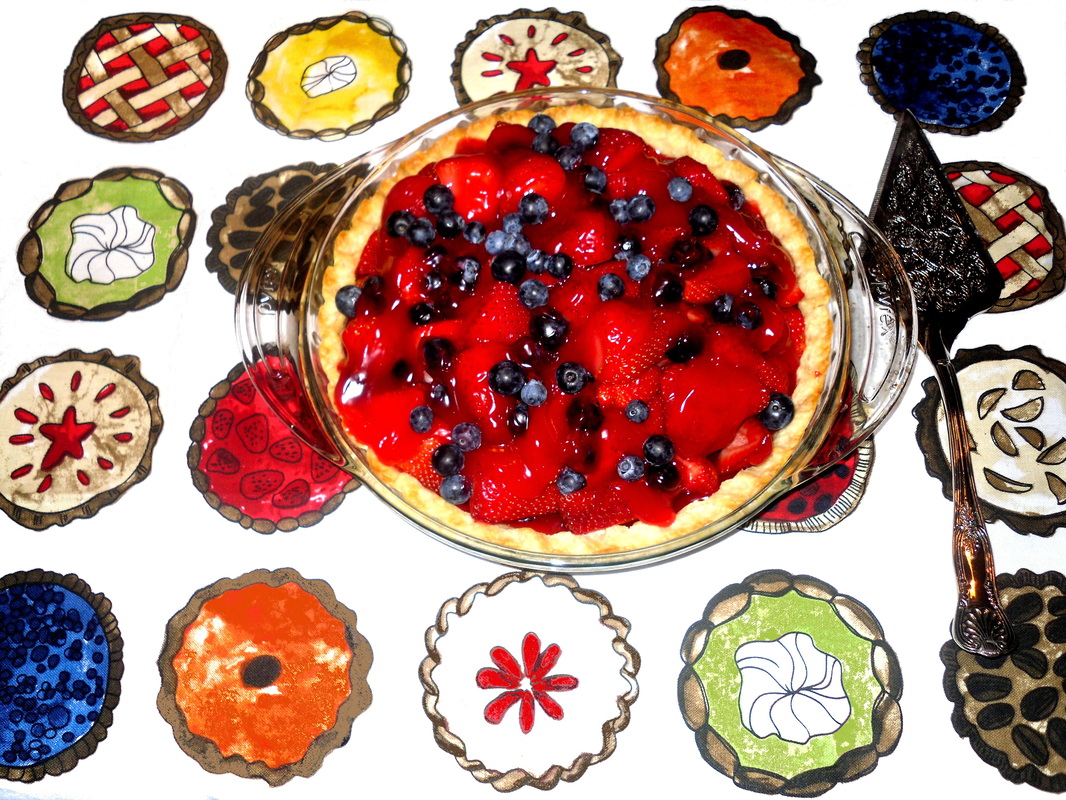
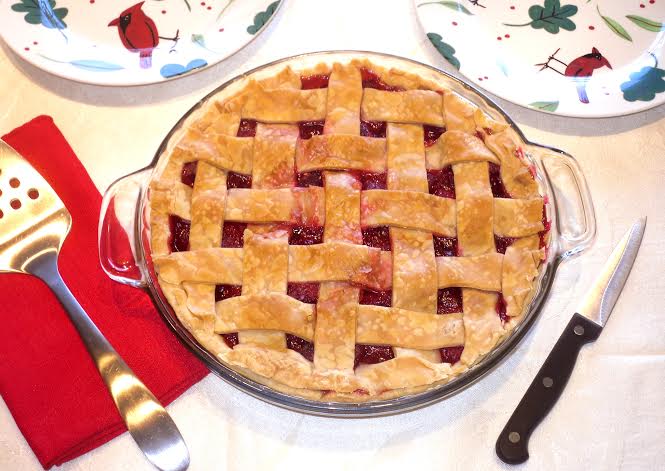
Using the additional strips of pie dough, evenly create a “basket weave” pattern in a top-to-bottom and side-to-side fashion. Just like you are weaving a basket, lift and “weave” the layers alternately, just like in the above photo.
When you are finished “weaving” the upper crust, then carefully affix the strips to the bottom crust, pressing the dough into scalloped “waves” along the edge, until it looks glamorous and professional.
Preheat your oven to 400 degrees Fahrenheit.
Take two long pieces of aluminum foil, that are twice as long as your nine inch pie pan, and place them in an “X” on the counter. Place the unbaked pie in the middle of them. One at a time, draw up each of the four edges of the aluminum foil and carefully crinkle them around the edge of the piecrust, avoiding direct contact with the piecrust. Do not cover any of the middle of the pie with the foil; you want to form an aluminum foil shield around the half-inch rim of the crust only. What you will end up with is a protective shield to avoid burning the edges of the piecrust. The aluminum foil will also serve as a shield to prevent the raspberry filling from drooling all over your oven.
Carefully place the aluminum foil protected pie in the middle of the 400-degree oven. Oven temperatures and the evenness of the heat vary, so you will have to “eye ball” the pie at 45 minutes. What you want to see is raspberry pie filling bubbling through the one-inch squares of exposed pie filling that are peeking out from your basket weave piecrust.
At the 45-minute point, you have to judge if additional baking time is needed. Make sure you check the pie every five minutes at this point. If you need it an additional five, ten or fifteen minutes, you will have to be the judge. Be careful not to burn the crust in the middle of the pie. When the filling is bubbling, but not watery, it is done. As the pie cools off, the cornstarch and sugar will “set up” the raspberry juice.
Immediately peel away the aluminum foil, to expose the perfectly browned edge of the baked piecrust. Allow the pie to cool to room temperature for at least an hour before serving.
This pie is really amazing. Vanilla ice cream or whipped cream goes perfectly with it. Anyone you serve it to will think you are a total “rock star” in the kitchen!
–2 Pie Crusts, one for the top, and one for the bottom.
–4 cups of Fresh Raspberries
–6 tablespoons of Corn Starch
–1 cup of Sugar
-2 tablespoons of Water
Directions:
You will need enough dough to make two unbaked piecrusts. If you are making your own crust, double the recipe. (See my simple pie dough recipe, with the Fresh Lemon Pie recipe).
If you use pre-made piecrusts, you will need two of them.
Place the rolled-out lower crust in a nine-inch pie pan, and make the edges even, all the way up to the lip of the pie pan.
With the second piecrust, lay it out on either a lightly floured cutting board, or the lightly floured kitchen counter.
Next, prepare the filling. This could not be easier. Place the raspberries in a large mixing bowl. Add the cornstarch, sugar, and water, and stir these three ingredients until the raspberries are coated. If you break any of the raspberries, that is fine. You don’t want to mash them, but you can allow some of them to break and bleed in this process.
Place the sugar and cornstarch coated raspberries into the bottom piecrust, making for an even filling. If there is any mounding of berries, mound it towards the middle of the pie shell.
With a sharp knife, cut the second rolled out raw piecrust into one-inch strips. Place the longest one across the middle of the pie. If you imagine your pie pan to be a clock, have the first strip of dough extend from 12:00 o’clock to 6:00 o’clock. The next long strip should be placed from 3:00 o’clock to 9:00 o’clock. Do not affix the strips to the bottom piecrust yet.
Using the additional strips of pie dough, evenly create a “basket weave” pattern in a top-to-bottom and side-to-side fashion. Just like you are weaving a basket, lift and “weave” the layers alternately, just like in the above photo.
When you are finished “weaving” the upper crust, then carefully affix the strips to the bottom crust, pressing the dough into scalloped “waves” along the edge, until it looks glamorous and professional.
Preheat your oven to 400 degrees Fahrenheit.
Take two long pieces of aluminum foil, that are twice as long as your nine inch pie pan, and place them in an “X” on the counter. Place the unbaked pie in the middle of them. One at a time, draw up each of the four edges of the aluminum foil and carefully crinkle them around the edge of the piecrust, avoiding direct contact with the piecrust. Do not cover any of the middle of the pie with the foil; you want to form an aluminum foil shield around the half-inch rim of the crust only. What you will end up with is a protective shield to avoid burning the edges of the piecrust. The aluminum foil will also serve as a shield to prevent the raspberry filling from drooling all over your oven.
Carefully place the aluminum foil protected pie in the middle of the 400-degree oven. Oven temperatures and the evenness of the heat vary, so you will have to “eye ball” the pie at 45 minutes. What you want to see is raspberry pie filling bubbling through the one-inch squares of exposed pie filling that are peeking out from your basket weave piecrust.
At the 45-minute point, you have to judge if additional baking time is needed. Make sure you check the pie every five minutes at this point. If you need it an additional five, ten or fifteen minutes, you will have to be the judge. Be careful not to burn the crust in the middle of the pie. When the filling is bubbling, but not watery, it is done. As the pie cools off, the cornstarch and sugar will “set up” the raspberry juice.
Immediately peel away the aluminum foil, to expose the perfectly browned edge of the baked piecrust. Allow the pie to cool to room temperature for at least an hour before serving.
This pie is really amazing. Vanilla ice cream or whipped cream goes perfectly with it. Anyone you serve it to will think you are a total “rock star” in the kitchen!